
Elastic Beanstalk is a platform within Amazon Web Service that is used for deploying and scaling web applications. It lets developers uploading their application to the AWS cloud, via AWS CodePipeline to named one, and then you can forget about the deployment.
And it seems like AWS has changed some stuff in newer versions of Elastic Beanstalk that uses Amazon Linux 2. And so most of the configuration you can find on internet are no longer working.
The following steps describe the newer approach to deploy an app with HTTP Basic Auth.
1. Create the .htpasswd
.htpasswd is used to store usernames and password for basic authentication of HTTP users. Elastic Beanstalk defines a large number of configuration options that you can use to configure your environment’s behavior and the resources that it contains. We will use one of theses 🙂
Create, at the root of your application bundle, a folder named .ebextensions and add a file named 00-http_basic_auth.config with the following code.
files:
  /etc/nginx/.htpasswd:
    mode: "000755"
    owner: root
    group: root
    content: |
      user:password
🚨 Replace user and password with your combination. You can easily find on internet how to generate a password for this file 🙂
2. Overriding the default location
Next, we need to overwrite the default nginx location conf provided by Beanstalk.
To do so, create a file in the bundle of your application at the location .platform/nginx/conf.d/elasticbeanstalk/00_application.conf.
Then, add this code. This is the default nginx location conf to which I added the last two lines.
ℹ️ Don’t forget to change the port number depends on your application
location / {
    proxy_pass          http://127.0.0.1:8080;
    proxy_http_version  1.1;

    proxy_set_header    Connection          $connection_upgrade;
    proxy_set_header    Upgrade             $http_upgrade;
    proxy_set_header    Host                $host;
    proxy_set_header    X-Real-IP           $remote_addr;
    proxy_set_header    X-Forwarded-For     $proxy_add_x_forwarded_for;

    auth_basic "Restricted";
    auth_basic_user_file /etc/nginx/.htpasswd;
}
3. Make HTTP basic auth works with health check
The configuration is ready so far and if you try to deploy your app, the HTTP Basic Auth will work but Beanstalk will indicate that your app is unhealthy because the health check now need to authenticate itself. To avoid this, we can make one path publicly available.
Add to your previously created file .platform/nginx/conf.d/elasticbeanstalk/00_application.conf the following code.
location /elb-status {
    proxy_pass          http://127.0.0.1:8080/status;
}
ℹ️ Make also this path works on your app but without any sensitive information, just a health check.
Finally, we just need to change the default health check path of the Beanstalk instance.
Go on your Beanstalk instance in your AWS Console and then click on “Configuration” and “Edit” in the Load Balancer section.
Modify the default process with this health check path : /elb-status.
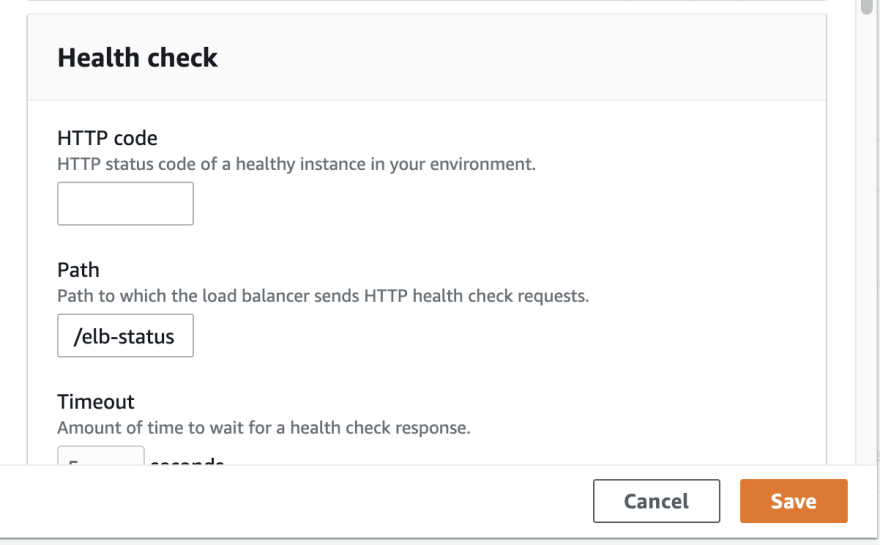
Save and apply changes
Leave a Reply